반응형
우분투 24.04에 Authentik을 설치하고 사용하는 방법
Authentik은 SSO, OIDC, SAML, LDAP 등 다양한 인증 방식을 지원하는 오픈소스 IDP(Identity Provider) 솔루션입니다.
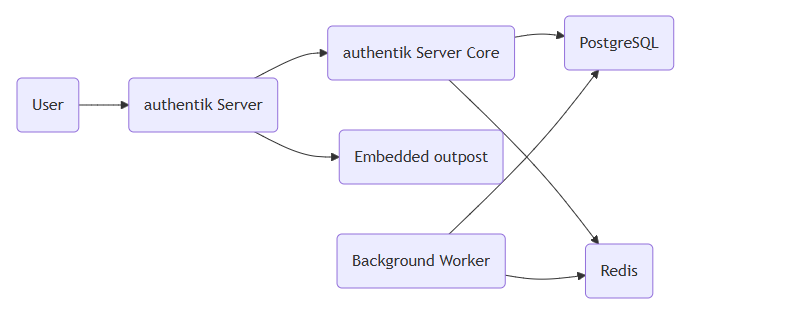
Architecture
패키지 설치
sudo apt update
sudo apt install -y docker.io git
sudo systemctl enable docker --now
Authentik 설치
디렉토리 생성 및 이동
mkdir authentikcd authentikdocker-compose.yml 구성 다운로드
wget https://goauthentik.io/docker-compose.yml.env 환경 변수 파일 생성
echo "PG_PASS=$(openssl rand -base64 36 | tr -d '\n')" >> .env
echo "AUTHENTIK_SECRET_KEY=$(openssl rand -base64 60 | tr -d '\n')" >> .env
echo "AUTHENTIK_ERROR_REPORTING__ENABLED=true" >> .envecho "COMPOSE_PORT_HTTP=9000" >> .env
echo "COMPOSE_PORT_HTTPS=9443" >> .env설정 확인
docker compose config이미지 다운로드
docker compose pull컨테이너 실행
docker compose up -d728x90
웹 UI 접속(브라우저 접속)
초기 관리자 설정
- 초기 관리자 계정(Username, Password)을 생성하고 로그인합니다.
http://<서버IP>:9000/if/flow/initial-setup/
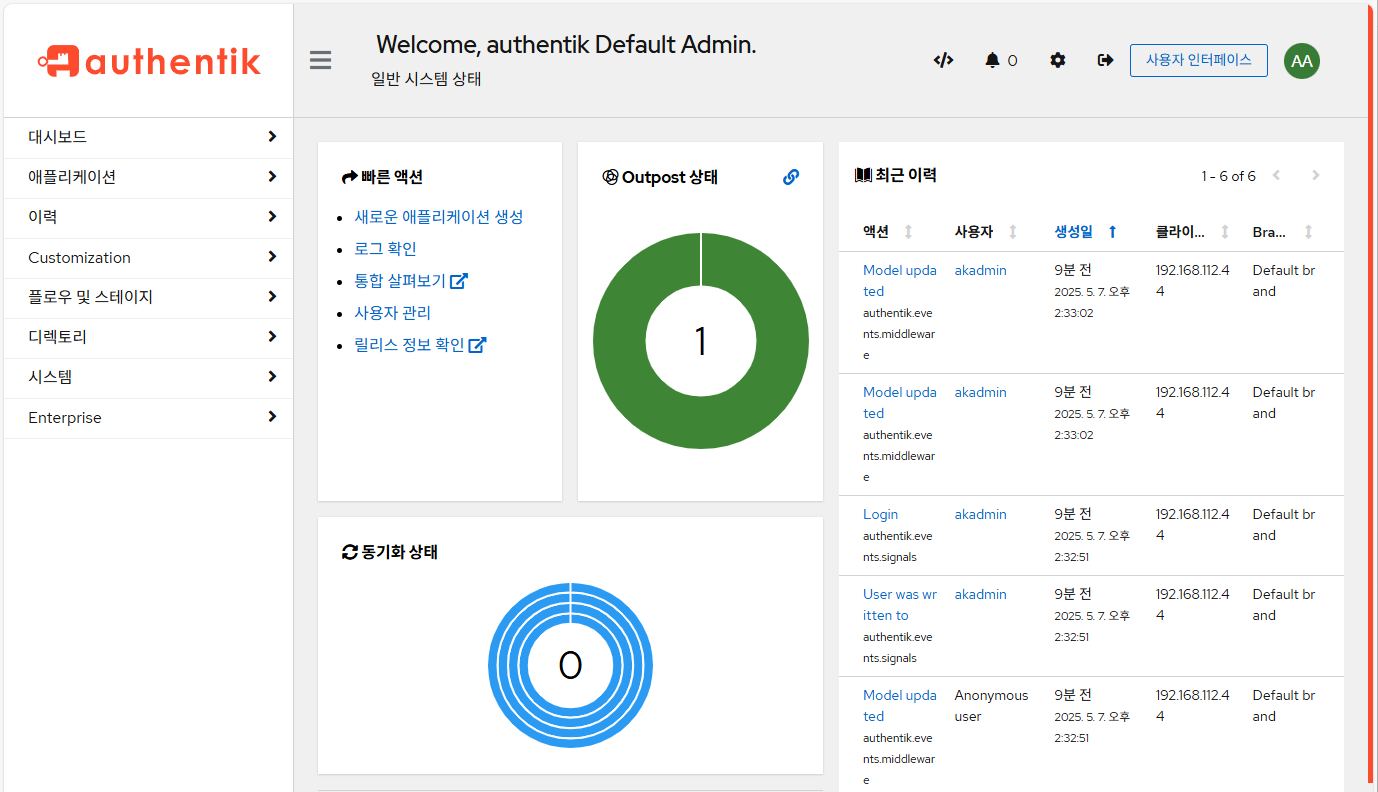
Authentik 대시보드 사용
- Users : 사용자 관리
- Providers : OIDC, SAML, LDAP 등 인증 방식 설정
- Applications : 외부 애플리케이션 연동 (예: Zabbix, Grafana, Teleport 등)
- Flows : 인증/가입/승인 흐름 정의
- Policies : 그룹, 사용자, 시간 등 조건에 따른 접근 제어
HTTPS 설정(선택)
NGINX를 통한 Reverse Proxy 구성 또는 인증서 설정이 필요합니다.
sudo vim /etc/nginx/nginx.confserver {
listen 443 ssl;
server_name auth.example.com;
ssl_certificate /etc/letsencrypt/live/auth.example.com/fullchain.pem;
ssl_certificate_key /etc/letsencrypt/live/auth.example.com/privkey.pem;
location / {
proxy_pass http://localhost:9000;
proxy_set_header Host $host;
proxy_set_header X-Forwarded-For $proxy_add_x_forwarded_for;
}
}
참고URL
- Authentik Documents : Docker Compose installation
- Authentik Documents : Architecture
728x90
반응형
'리눅스' 카테고리의 다른 글
| Docker를 사용하여 Zabbix를 배포하는 방법 (0) | 2025.05.08 |
|---|---|
| CentOS 8에서 최신 버전의 Docker를 설치하는 방법 (0) | 2025.05.07 |
| Zabbix 7 LTS에서 API를 사용하는 방법 (1) | 2025.05.07 |
| 우분투 24.04에서 ntpdate와 hwclock을 사용하여 시스템 시간 및 하드웨어 클럭을 수동으로 동기화하는 방법 (0) | 2025.05.07 |
| 리눅스 eval 명령어 사용법 정리 (0) | 2025.05.05 |


