우분투 24.04에서 NetBox를 설치하는 방법
우분투 24.04에서 NetBox를 설치하는 방법
NetBox는 IP Address Management(IPAM)와 Data Center Infrastructure Management(DCIM) 기능을 제공하는 오픈소스 플랫폼으로 인프라 자산 관리와 네트워크 정보를 통합적으로 관리할 수 있습니다.
테스트 환경
운영체제 정보
$ lsb_release -d
Description:    Ubuntu 24.04.2 LTS
1. 시스템 업데이트 및 필수 의존성 설치
우분투 24.04의 기본 저장소에서 최신 라이브러리를 가져옵니다.
sudo apt updatesudo apt install -y curl gnupg lsb-release ca-certificatessudo apt install -y python3 python3-pip python3-venv \
gcc libpq-dev libssl-dev libffi-dev \
git graphviz2. Redis 설치
NetBox는 캐시 및 비동기 작업 큐(RQ Worker)를 위해 Redis를 사용합니다.
curl -fsSL https://packages.redis.io/gpg \
  | sudo gpg --dearmor -o /usr/share/keyrings/redis-archive-keyring.gpg

echo "deb [signed-by=/usr/share/keyrings/redis-archive-keyring.gpg] \
https://packages.redis.io/deb $(lsb_release -cs) main" \
  | sudo tee /etc/apt/sources.list.d/redis.list

sudo apt update
sudo apt install -y redis-server
redis-server -vRedis server v=8.6.1 sha=00000000:1 malloc=jemalloc-5.3.0 bits=64 build=3eab5ed2d769eb41서비스 상태 확인
sudo systemctl enable --now redis-server
sudo systemctl status redis-server
3. PostgreSQL 설치 및 데이터베이스 설정
NetBox는 PostgreSQL 데이터베이스를 사용하여 장비, IP, 네트워크 등의 정보를 저장합니다.
PostgreSQL 설치
sudo apt install curl ca-certificates
sudo install -d /usr/share/postgresql-common/pgdg
sudo curl -fsSL -o /usr/share/postgresql-common/pgdg/apt.postgresql.org.asc \
  --fail https://www.postgresql.org/media/keys/ACCC4CF8.asc

. /etc/os-release
sudo sh -c "echo 'deb [signed-by=/usr/share/postgresql-common/pgdg/apt.postgresql.org.asc] https://apt.postgresql.org/pub/repos/apt $VERSION_CODENAME-pgdg main' > /etc/apt/sources.list.d/pgdg.list"

sudo apt update
sudo apt install -y postgresql-18
psql --versionpsql (PostgreSQL) 18.3 (Ubuntu 18.3-1.pgdg24.04+1)데이터베이스 생성 및 계정 설정
sudo -u postgres psql -c "CREATE DATABASE netbox_db;"
sudo -u postgres psql -c "CREATE USER netbox_user WITH PASSWORD 'YourStrongPassword';"
sudo -u postgres psql -c "GRANT ALL PRIVILEGES ON DATABASE netbox_db TO netbox_user;"
sudo -u postgres psql -c "ALTER DATABASE netbox_db OWNER TO netbox_user;"---
sudo -u postgres psqlCREATE DATABASE netbox_db;
CREATE USER netbox_user WITH PASSWORD 'YourStrongPassword';
GRANT ALL PRIVILEGES ON DATABASE netbox_db TO netbox_user;
ALTER DATABASE netbox_db OWNER TO netbox_user;
\q---
4. NetBox 소스 다운로드 및 권한 설정
NetBox 소스를 다운로드하고 서비스 계정을 생성합니다.
sudo mkdir -p /opt/netbox
cd /opt/netbox

sudo git clone -b main https://github.com/netbox-community/netbox.git .
NetBox 시스템 사용자 생성 (로그인 불가 계정)
sudo adduser --system --group netbox디렉토리 권한 설정
sudo chown --recursive netbox /opt/netbox/netbox/media/
sudo chown --recursive netbox /opt/netbox/netbox/reports/
sudo chown --recursive netbox /opt/netbox/netbox/scripts/
5. NetBox 구성 (Configuration)
설정 파일 복사
cd /opt/netbox/netbox/netbox/
sudo cp configuration_example.py configuration.py
Secret Key(비밀 키) 생성
python3 ../generate_secret_key.pyTip: 비밀번호 생성기나 python3 ../generate_secret_key.py를 사용해 강력한 Secret Key를 만드세요.
설정 파일 수정
sudo vim configuration.pyALLOWED_HOSTS = ['*']
# PostgreSQL database configuration.
DATABASES = {
'default': {
'ENGINE': 'django.db.backends.postgresql', # Database engine
'NAME': 'netbox_db',
'USER': 'netbox_user',
'PASSWORD': 'YourStrongPassword',
'HOST': 'localhost',
'PORT': '',
'CONN_MAX_AGE': 300,
}
}
# Secure Key
SECRET_KEY = 'H@(A^i*BRcVfDp#Er&rje1fCidZZt_Pu$S0o95GhkMV5(b2UZ6'- ALLOWED_HOSTS = ['*'] (또는 실제 도메인/IP)
- DATABASE 정보 (이름, 사용자, 비밀번호) 입력
- REDIS 설정 (기본값 유지 가능)
- SECRET_KEY = '복사한_키_입력'
6. NetBox 설치 및 관리자 계정 생성
NetBox에서 제공하는 설치 스크립트를 실행합니다.
sudo /opt/netbox/upgrade.sh- 스크립트 작업 수행
- Python 가상환경 생성
- NetBox 의존성 패키지 설치
- 데이터베이스 마이그레이션
- 정적 파일 생성
You are installing (or upgrading to) NetBox version 4.5.4
Using Python 3.12.3
Creating a new virtual environment at /opt/netbox/venv...
Updating pip (pip install --upgrade pip)...
Requirement already satisfied: pip in ./venv/lib/python3.12/site-packages (24.0)
Collecting pip
  Downloading pip-26.0.1-py3-none-any.whl.metadata (4.7 kB)
Downloading pip-26.0.1-py3-none-any.whl (1.8 MB)
   ━━━━━━━━━━━━━━━━━━━━━━━━━━━━━━━━━━━━━━━━ 1.8/1.8 MB 6.9 MB/s eta 0:00:00
Installing collected packages: pip
  Attempting uninstall: pip
    Found existing installation: pip 24.0
    Uninstalling pip-24.0:
      Successfully uninstalled pip-24.0
Successfully installed pip-26.0.1
pip 26.0.1 from /opt/netbox/venv/lib/python3.12/site-packages/pip (python 3.12)
Installing Python system packages (pip install wheel)...
Collecting wheel
  Downloading wheel-0.46.3-py3-none-any.whl.metadata (2.4 kB)
...
Skipping config initialization (database unavailable)
Operations to perform:
  Apply all migrations: account, auth, circuits, contenttypes, core, dcim, django_rq, extras, ipam, sessions, social_django, taggit, tenancy, thumbnail, users, virtualization, vpn, wireless
Running migrations:
  Applying contenttypes.0001_initial... OK
  Applying contenttypes.0002_remove_content_type_name... OK
...
Completed. Total entries: 7
Removing expired user sessions (python3 netbox/manage.py clearsessions)...
--------------------------------------------------------------------
WARNING: No existing virtual environment was detected. A new one has
been created. Update your systemd service files to reflect the new
Python and gunicorn executables. (If this is a new installation,
this warning can be ignored.)

netbox.service ExecStart:
  /opt/netbox/venv/bin/gunicorn

netbox-rq.service ExecStart:
  /opt/netbox/venv/bin/python

After modifying these files, reload the systemctl daemon:
  > systemctl daemon-reload
--------------------------------------------------------------------
Upgrade complete! Don't forget to restart the NetBox services:
  > sudo systemctl restart netbox netbox-rq
관리자 계정 생성
source /opt/netbox/venv/bin/activate
cd /opt/netbox/netbox
python3 manage.py createsuperuserUsername: admin
Email address: admin@scbyun.com
Password:
Password (again):
Superuser created successfully.deactivate7. 서비스 배포 (Gunicorn & Systemd)
Gunicorn 설정 파일 복사
sudo cp /opt/netbox/contrib/gunicorn.py /opt/netbox/gunicorn.pyNetBox 서비스를 Systemd에 등록합니다.
$ ls -l /opt/netbox/contrib/*.service
-rw-r--r-- 1 root root 403 Mar  6 11:12 /opt/netbox/contrib/netbox-rq.service
-rw-r--r-- 1 root root 668 Mar  6 11:12 /opt/netbox/contrib/netbox.service
sudo cp /opt/netbox/contrib/*.service /etc/systemd/system/서비스 활성화
sudo systemctl daemon-reload
sudo systemctl enable --now netbox netbox-rq
Created symlink /etc/systemd/system/multi-user.target.wants/netbox.service → /etc/systemd/system/netbox.service.
Created symlink /etc/systemd/system/multi-user.target.wants/netbox-rq.service → /etc/systemd/system/netbox-rq.service.서비스 상태 확인
sudo systemctl status netbox8. 웹 서버(Nginx) 설정
외부 접속을 위해 Nginx를 Reverse Proxy로 구성합니다.
sudo apt install -y gnupg2 ubuntu-keyring

curl -fsSL https://nginx.org/keys/nginx_signing.key | gpg --dearmor \
  | sudo tee /usr/share/keyrings/nginx-archive-keyring.gpg >/dev/null

echo "deb [signed-by=/usr/share/keyrings/nginx-archive-keyring.gpg] \
http://nginx.org/packages/ubuntu $(lsb_release -cs) nginx" \
  | sudo tee /etc/apt/sources.list.d/nginx.list

sudo apt update
sudo apt install -y nginx
nginx -vnginx version: nginx/1.28.2NetBox Niginx 설정 적용
sudo cp /opt/netbox/contrib/nginx.conf /etc/nginx/conf.d/netbox.conf자체 서명 인증서 생성하기 (HTTPS 유지)
sudo mkdir -p /opt/netbox/ssl

sudo openssl req -x509 -nodes -days 365 -newkey rsa:2048 \
  -keyout /opt/netbox/ssl/key.pem \
  -out /opt/netbox/ssl/cert.pem \
  -subj "/C=KR/ST=Seoul/L=Jongno-gu/O=SangChul Co., Ltd./OU=Infrastructure Team/CN=*.scbyun.com"
sudo vim /etc/nginx/conf.d/netbox.conf---
sudo vim /etc/nginx/conf.d/netbox.confserver {
# Redirect HTTP traffic to HTTPS
listen 80 ipv6only=off;
server_name netbox.scbyun.com;
return 301 https://$host$request_uri;
}
server {
listen 443 ssl ipv6only=off;
# CHANGE THIS TO YOUR SERVER'S NAME
server_name netbox.scbyun.com;
ssl_certificate /opt/netbox/ssl/cert.pem;
ssl_certificate_key /opt/netbox/ssl/key.pem;
client_max_body_size 25m;
location /static/ {
alias /opt/netbox/netbox/static/;
}
location / {
# Remove these lines if using uWSGI instead of Gunicorn
proxy_pass http://127.0.0.1:8001;
proxy_set_header X-Forwarded-Host $http_host;
proxy_set_header X-Real-IP $remote_addr;
proxy_set_header X-Forwarded-Proto $scheme;
# Uncomment these lines if using uWSGI instead of Gunicorn
# include uwsgi_params;
# uwsgi_pass 127.0.0.1:8001;
# uwsgi_param Host $host;
# uwsgi_param X-Real-IP $remote_addr;
# uwsgi_param X-Forwarded-For $proxy_add_x_forwarded_for;
# uwsgi_param X-Forwarded-Proto $http_x_forwarded_proto;
}
}---
설정 확인
sudo nginx -t서비스 재시작
sudo systemctl restart nginx9. NetBox 접속
웹 브라우저에서 다음 주소로 접속합니다.
http://서버_IP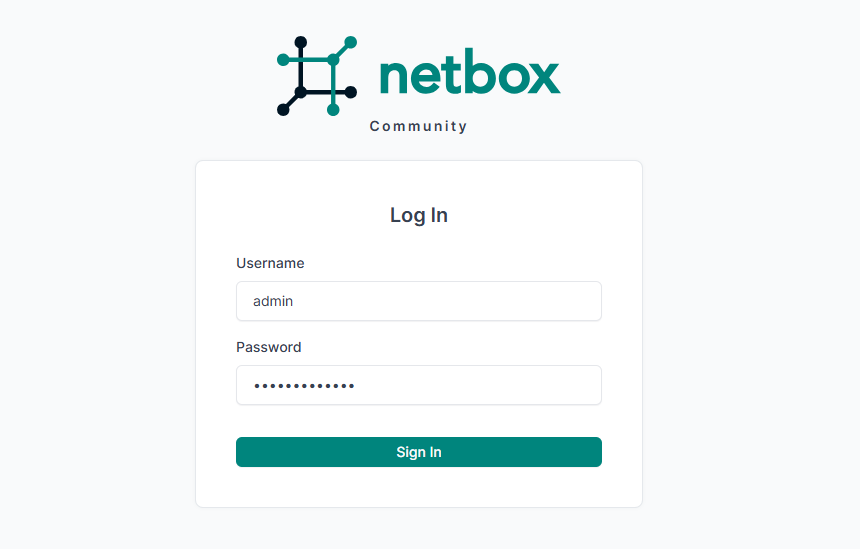
참고URL
- 변군이글루 블로그 : 우분투 24.04에 최신 버전의 Redis 서버를 설치하는 방법
- 변군이글루 블로그 : 우분투 24.04에서 PostgreSQL을 설치하는 방법
- 변군이글루 블로그 : 우분투 24.04에서 Nginx 1.28과 PHP 8.3을 설치하는 방법